Using your own shaders
The recommended way to create trails in SlashForge is through the TrailProfile system. It gives you access to the included shader features, presets, texture controls, gradients, dissolve options, and other built-in trail settings without needing to write a custom shader.
That said, SlashForge should not lock you into one visual pipeline. If your project needs a completely custom shader or a different rendering style, you can bypass the TrailProfile system and use your own material instead.
But if you must bypass the system, then here's support for it;
Even when you bypass the TrailProfile system, SlashForge still gives you the most important part of the tool: the procedural trail mesh.
The generated mesh is lightweight, runtime-friendly, and already contains useful shader data such as vertex colors, stretched UVs, and distance-based UVs.
If the TrailProfile system feels restrictive for your use case, feedback is very welcome.
The goal is to keep the default workflow easy while still supporting advanced custom setups.
If you're making your own shader, here's some features the mesh itself contains that you can use in your shader;
Vertex Colors
The mesh is already created with vertex colors baked in to give you different information.
585 586 587 | |
VertexColor.Red
vertexColor.r will tell you how close the segment is to die. 0 means about to die, 1 means it was just born.
VertexColor.Green
vertexColor.g will tell you how much lifetime the "Strip" has left.
- This depends on BeginEmission() and the lifetime value.
- Same for the whole
Strip(Strip meaning a part of Trail that starts when BeginEmission is called and lasts until EndEmission is called. There can be multiple strips within one trail component. For example; if we had a fast triple slash animation; we would likely call BeginEmission() and EndEmission() 3 times, there would be 3 different Strips that have their own lifecycles, uv's and positions) - Starts at 1 when the strip starts, and approaches 0 as lifetime amount of time passes.
VertexColor.Blue
vertexColor.b will only be set-up if you are using the StartFadeOut function likeso;
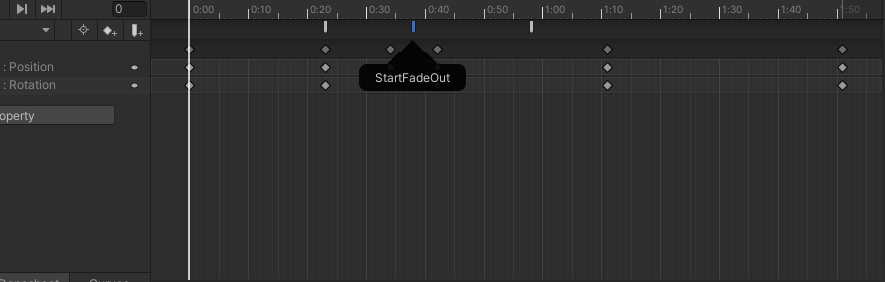
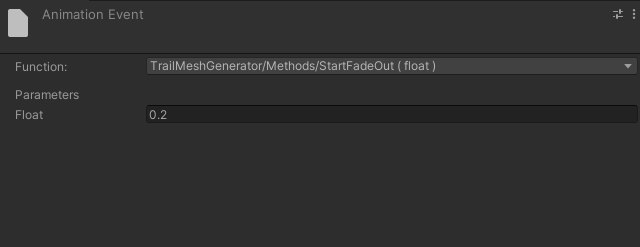
You should call the function towards the end of the animation and pass in a float telling how harsh it should lerp into the blue color.
This was intended to be used to smoothen the end of the trail so it doesn't get cut off abruptly. You can use it for that in your shader as well.
UV's
There is also two different UV setups;
- The classic, Stretched UV that every trail uses;
- The Distance Based, world UV that can stay in place even when new vertices are being created, and it comes almost free of cost.
UV0
UV1
You can use UV0 for general, stretched textures like in the Anime example;
You can use UV1 for more textured trails that need their texture to stay in place instead of follow the head and tail;