Distortion Module
We now bring the final touch of polish to our trail
- This is the absolute polish tool for your trails
- Smears the background view using one of your noises
- It supports the fast swing feel EXTREMELY WELL
- You can just turn down all other Modules and just make a trail out of this :D
Okay let's start,
Before we can see any Distortion
We have to enable Opaque Texture in the Render Pipeline Asset(For URP).
I don't know how to Enable Opaque Texture
Just try to Enable the Distortion Module;
It will kindly yell at you to enable Opaque Texture
And it'll give you a button that takes you to your Render Pipeline Asset.

Click Select URP Asset and Enable Opaque Texture there;
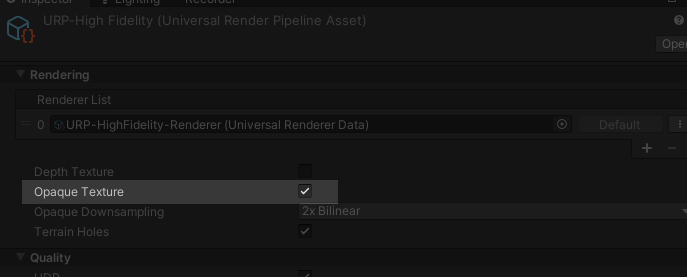
Make sure Opaque Texture is checked
How do you normally do it without help?
Go to Project Settings -> Graphics
You should see this;
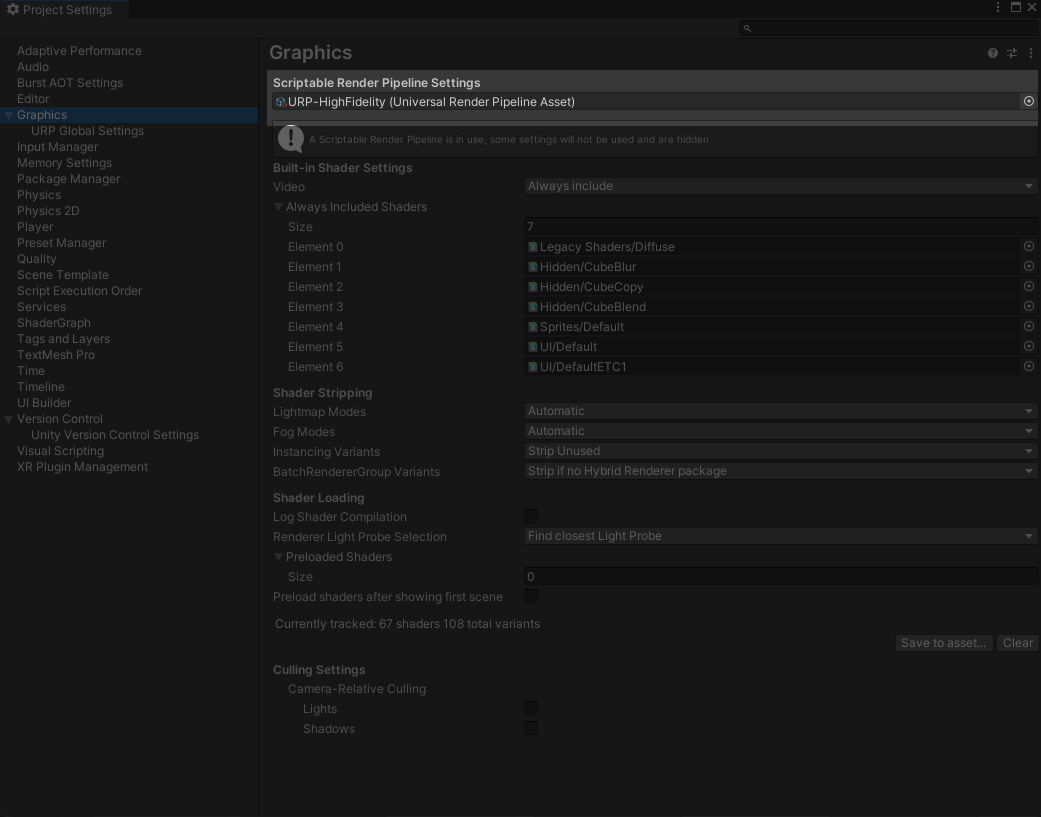
Double click the highlighted asset and go to it's inspector;
Make sure Opaque Texture is checked
Controls;
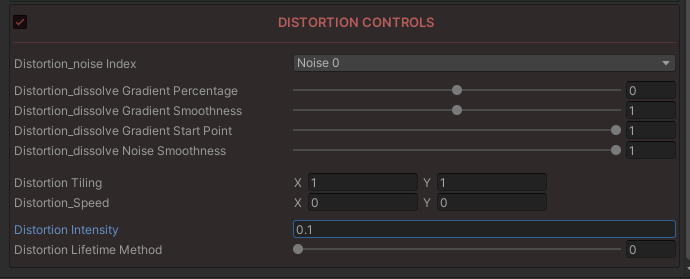
Here is the baseline for this section;
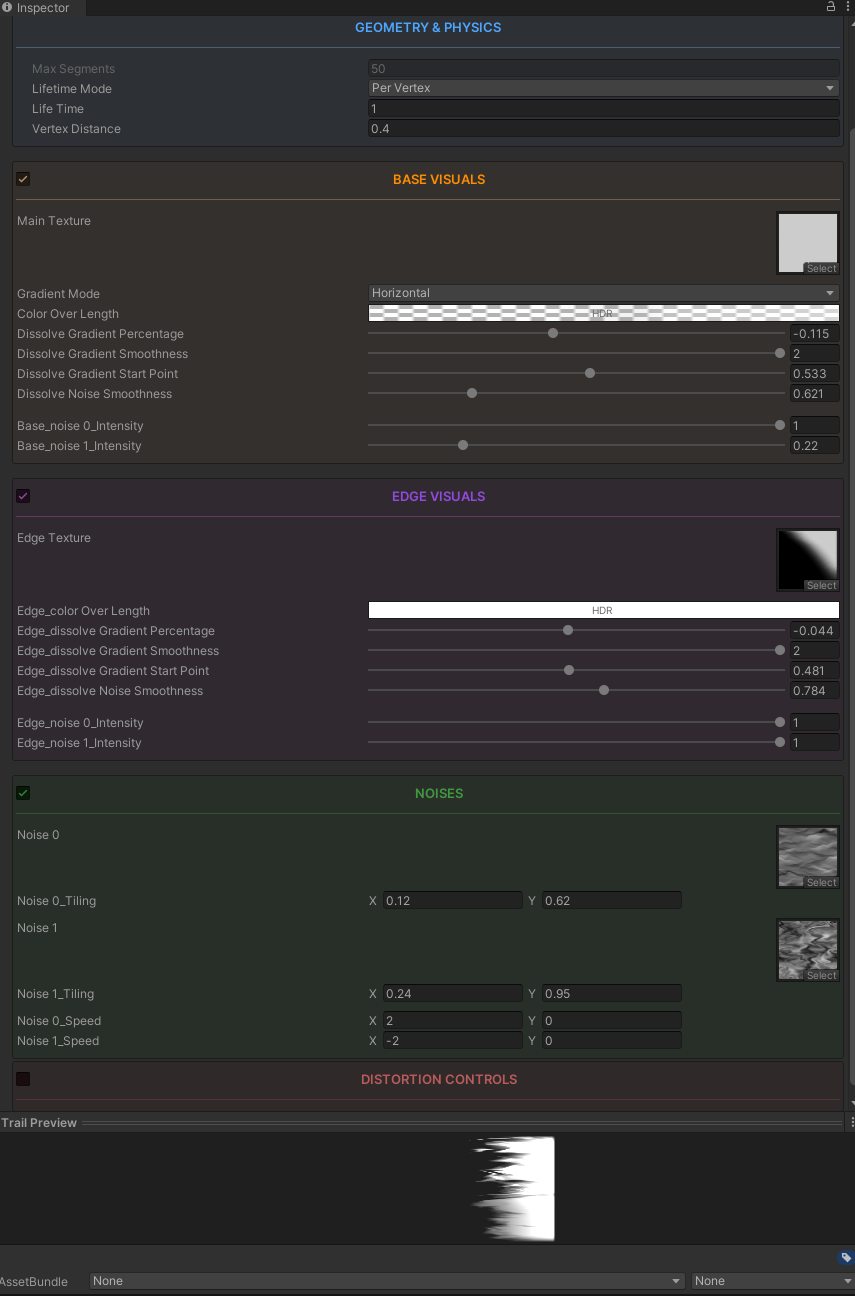
We start from where we left off at the end of Noise Module Section.
BUT I also gone ahead and added an Edge Module(using the same exact info we learned from the Base Module Section)
If you followed so far, you know how to achieve this for sure;
If not, copy these values to follow along;
Noise Choice
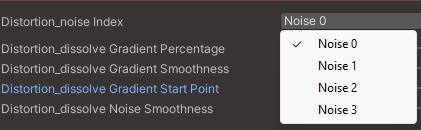
Distortion Module uses one of the noises that you determined in the Noises module.
Why not it's own Noise?
Distortion is a background effect that doesn't let you see the texture details very well anyways.
There aren't many situations where you will need a SPECIFIC noise for a SPECIFIC Distortion effect.
Because it won't be that readable anyways; just a smear on the background.
I don't see the upside of giving it it's own texture; but if it's asked for by users, will be pretty easy to add.
Since we have 2 noises max determined in the Noises Module, we can choose Noise0 or Noise1 to use for the Distortion.
Same 4

You MUST be familiar with all these by now. You know exactly how to use them.
If not, refer to 4 Shared Control Values or the Base Visuals Module for detailed explanation.
Distortion Intensity
This value controls how much distortion we see. If 0, we see no distortion
(but if it's 0, it's important to just Disable the Module because it will still show the Opaque Texture instead of actual transparency; which might blur the background a bit)
Distortion Lifetime Method
This is quite the same as Lifetime Mode we discussed in Geometry & Physics Section
- Value Closer to 1 = Dissolve of the Distortion happens all together thoroughout the trail
- Value Closer to 0 = Dissolve happens more based on the Vertex Lifetime
So if you read the Geometry & Physics Section, then I can say;
- 1 = Per Slice
- 0 = Per Vertex
- Everything in between Linearly Interpolated
Let's make it then!!
-
Click the checkbox and Enable the
Distortion Module -
And change the Distortion Intensity to 1
Well, doesn't look so good huh?
We need to play with the values a little bit just like we did in the Noises Section
Pro Tip
Just like we did in the Noises section, we want a feel of momentum here; even more so.
The first two actions are;
- Stretching it by playing with the tiling
- And adding some motion

Well, motion didn't matter at all because the visual lifetime ends before we get the chance to see it static anyways.
Seems like we'll have to play with The 4 Values again(aka Dissolve Gradient values)
Here is what looked right to me;
Since We talked about Gradient properties many times over, I won't go over them here.
But I'll rather show you what i ended up with after some poking around.
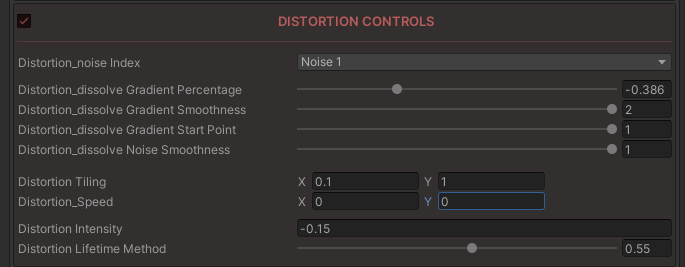
Most important decisions to understand here are;
Intensity;
- Distortion really takes away attention from the trail itself if you use very high value.
- AND It doesn't even look like distortion at that point.
LifetimeMethod;
- It's a balancing act between the gradient percentage and the smoothness you want.
- I ended up on this value; you could end up somewhere else for what you want.
- Just remember, 0 = Per Vertex; 1 = Per Slice. In between is not as easy to grasp by looking; and not an exact science. It's just your Art Direction to find the value needed.