Start Seeing Trails in Minutes
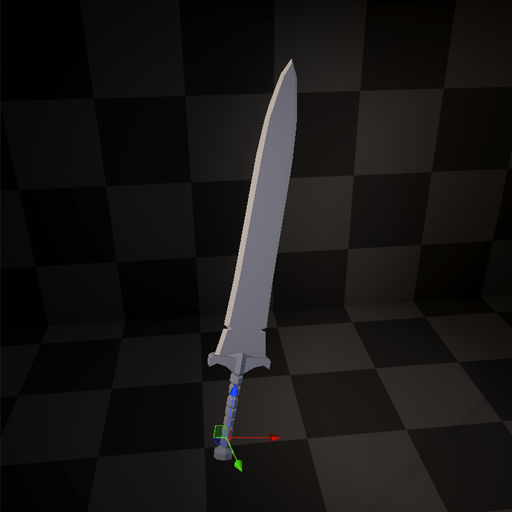
Step 1 - Find Your Sword Asset
(Or any pointy stick you might have.)
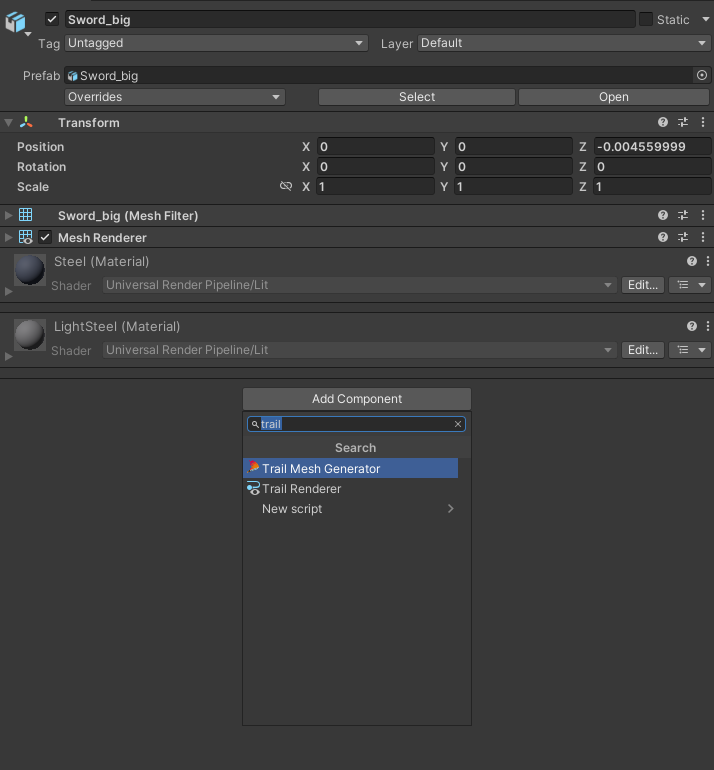
Step 2 - Add the Trail Mesh Generator component.
The component DOES NOT RELY ON any other components like MeshFilter() or MeshRenderer()
Note
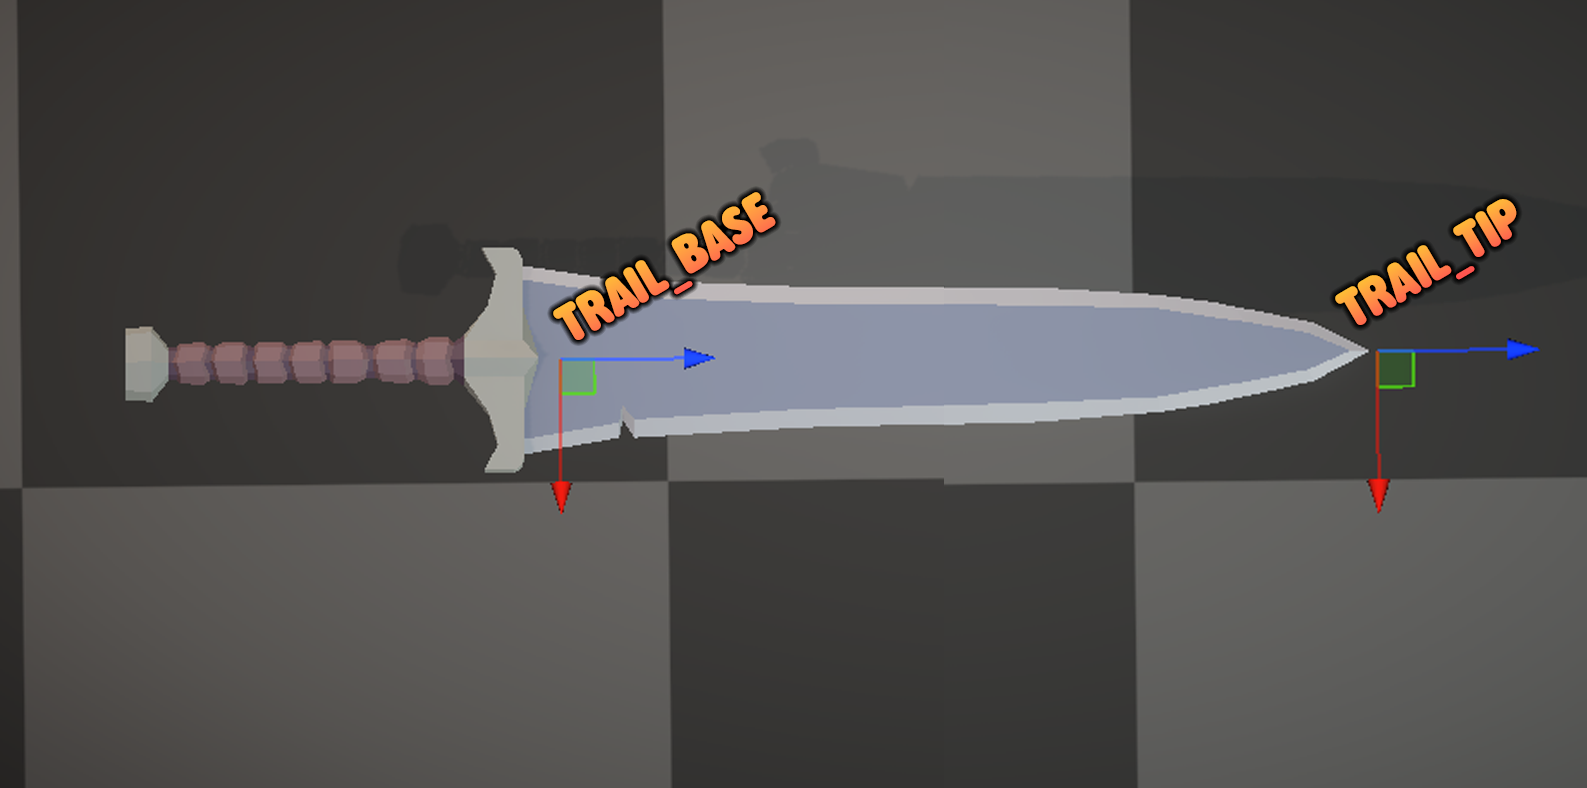
The component automatically creates and assigns:
- `Trail_Tip`

- `Trail_Base`
Check their positions after setup.
If you had a MeshFilter() in the same object, we automatically try to approximate Tip/Base positions;
Otherwise you can position those child objects manually.
TheTrail_Tip should already be near the pointy end of the weapon,
but Trail_Base may need adjustment depending on the mesh.

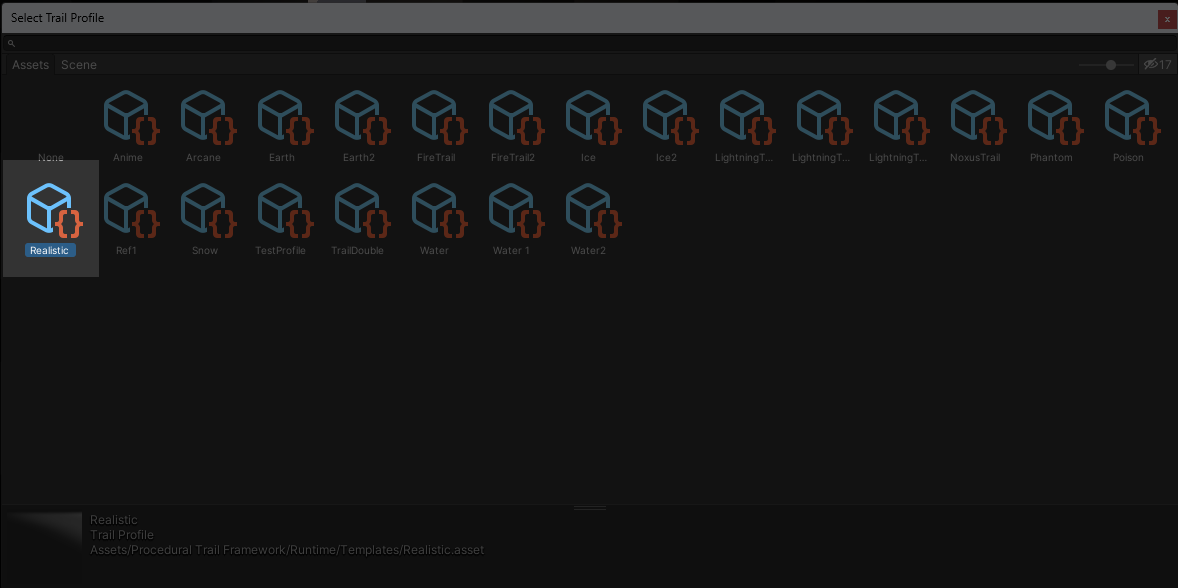
Step 3 - Click the selection box near Trail Profile
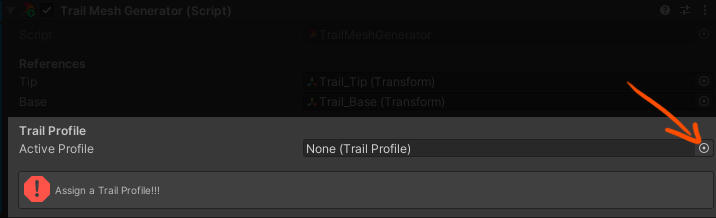
Let's choose Realistic_Default for now
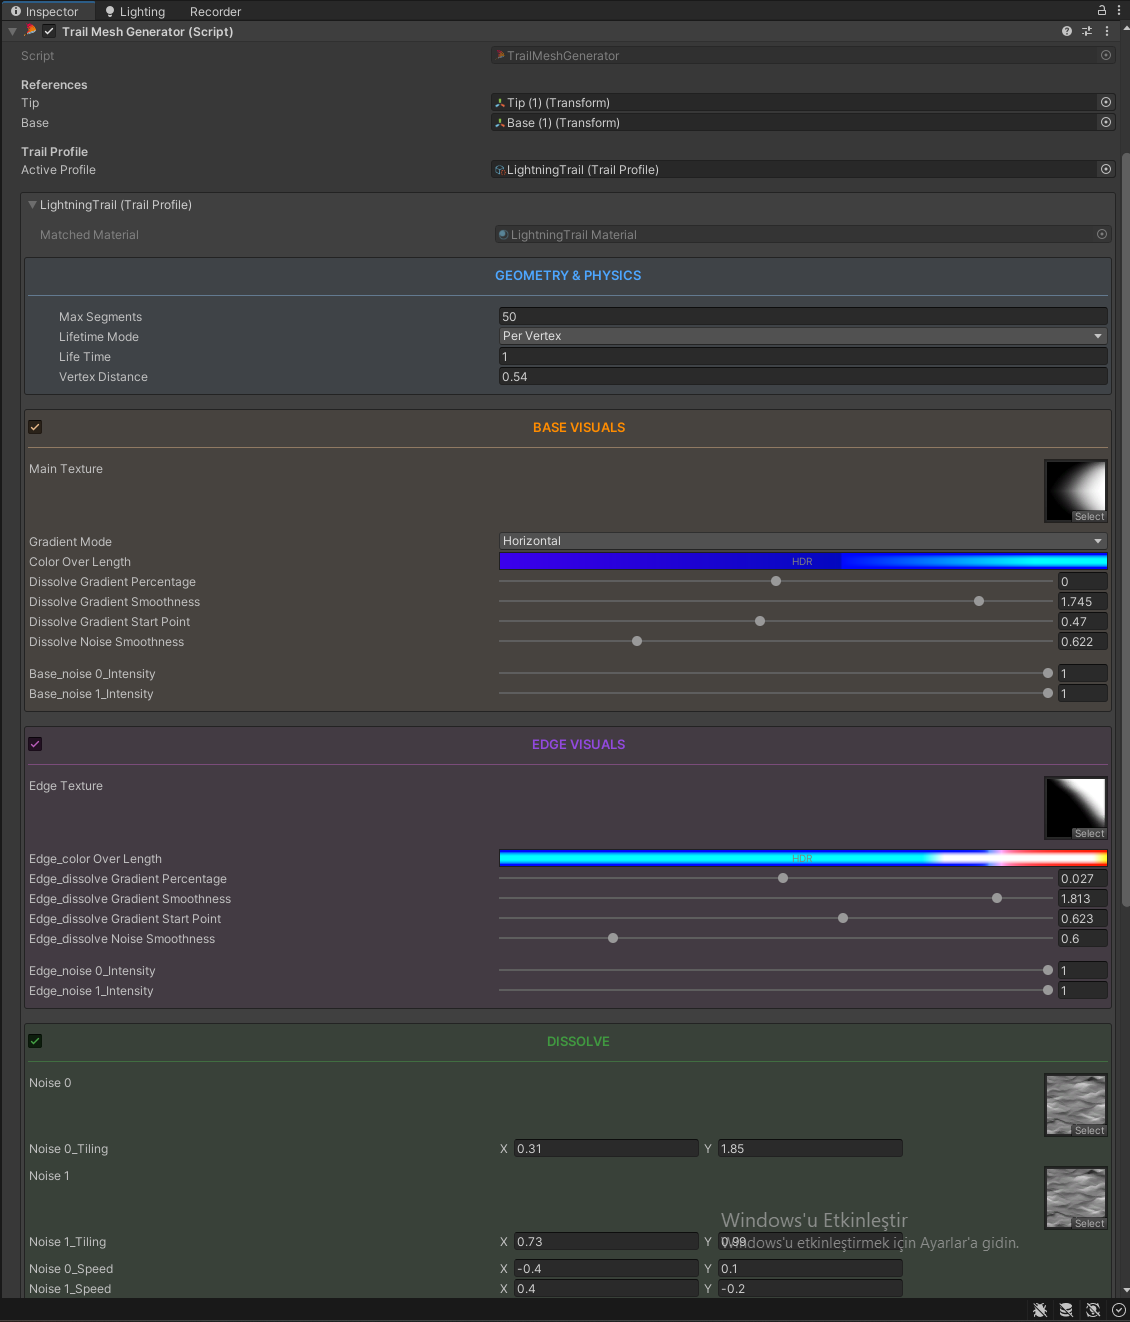
You should see the TrailProfile's own editor neatly embedded into this component as a foldout for easy customization:
Step 4 - Start the game and call BeginEmission()
Tip
If you already have an animation playing, you can call BeginEmission() using an AnimationEvent.
Otherwise, you can call it directly from your scripts.
You decide exactly when the trail starts emitting!!
Note
If the gameObject you put the TrailMeshGenerator on is child of an Animator, the system will have automatically added a SlashforgeAnimatorEventProxy to the object that has the animator. Which would let you use the events directly from there.
I don't know how to call BeginEmission() from code
public class YourOwnClass : MonoBehaviour
{
    public TrailMeshGenerator trail;

    void StartAttack()
    {
        trail.BeginEmission();
    }

}
You can call trail.BeginEmission(); whenever your attack starts.
I don't know how to use Animation Events
- Open your animation clip.
- Move the timeline cursor to the frame you want the trail to start.
- Click "Add Event".
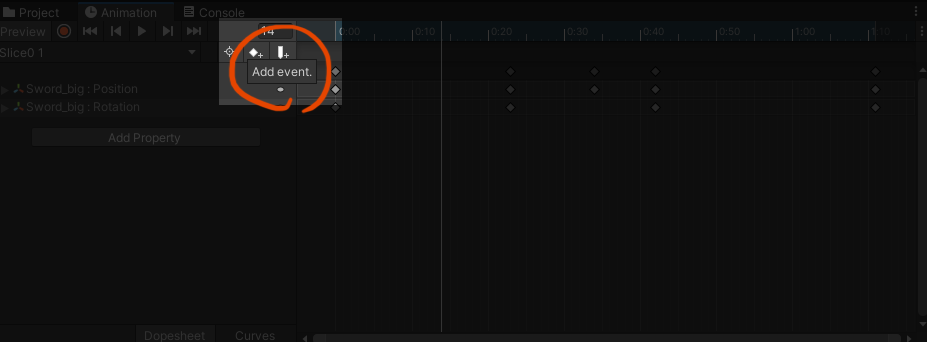
- Click the Event that is just created.

- In the inspector, find 'TrailMeshGenerator' and select
BeginEmission.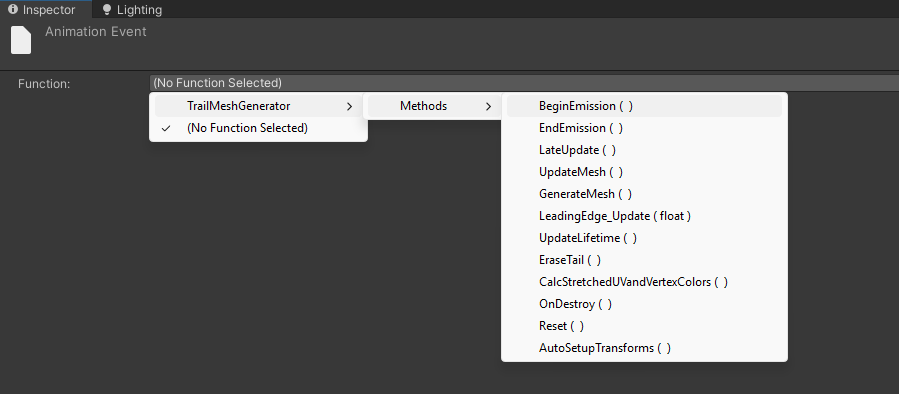
- You can use the same steps to create another event later in the animation and call 'EndEmission()' this time to stop the trail. In fact it's recommended that you eventually call EndEmission().
Step 5 - Change Trail Profiles and check different styles until you find a style you like!
Tip
Or maybe you say these are "Not quite my tempo!" and want to create your own?
Check the Creating/Customizing Trails Section
Reasons for a trail not to work:
-
No trail profile was assigned
-
BeginEmission() is not called
-
EndEmission() was called
-
The animation transition ate the trigger
(Meaning; the previous animation was still transitioning while this animation was supposed to trigger the Animation Event, so the event never triggered because we weren't fully in this animation)
-
There is no distance between
Trail_TipandTrail_Base -
You've changed the TrailProfile during runtime BUT the MaxSegments property of those 2 trails were different.
(The MaxSegments value of a TrailMeshGenerator component cannot change during runtime due to the nature of the ring buffer. You can still switch TrailProfile's during runtime; they just have to have the exact same max segments count)
-
LifetimeModewas set toPer SliceorPer Vertex X Per Sliceand the BeginEmission was called. But enough time passed since the BeginEmission was called that the slice has died before sword started moving. (By "enough time" I mean Lifetime value. This mechanic is better explained in the Geometry & Lifetime Section under the Lifetime Modes. For now, set the LifetimeMode to Per Vertex as a temporary fix. Then you can check the mentioned section and learn to use other Modes.)