Base Visuals Module
We are just getting into the visuals now!!
Base Visuals Moduleis mostly for the Main Shape of the trail.- It might be used for after-smoke or other aftermath effects
- OR as a darker background to let the brighter edges pop.
- Usually intended for much darker values than the Edge Module (But tbh, no one can stop you if you wanna blow up the HDR/Bloom on this one as well)
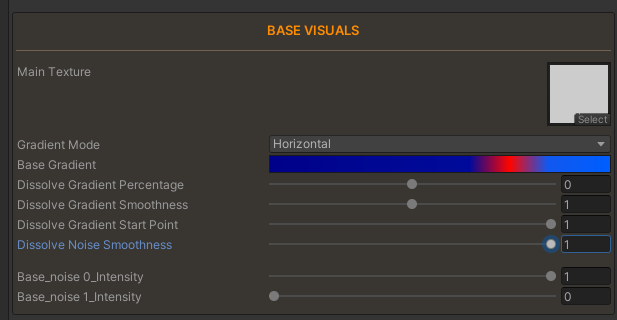
Controls;
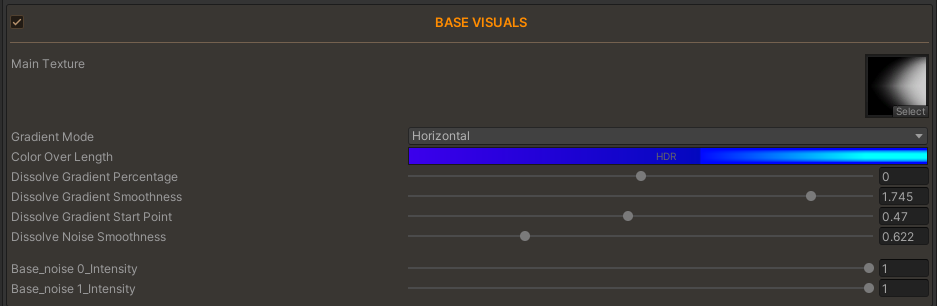
Let us start from the most important 4 values;
These 4 values exist in almost every module; they are the main way we interact with the lifetime and geometry. These are literally how we relate to the mesh;
- Gradient Percentage
- Gradient Smoothness
- Gradient Start Point
- Noise Smoothness
Before we start;
Let's assume our Main Shape Texture is just a white fill.
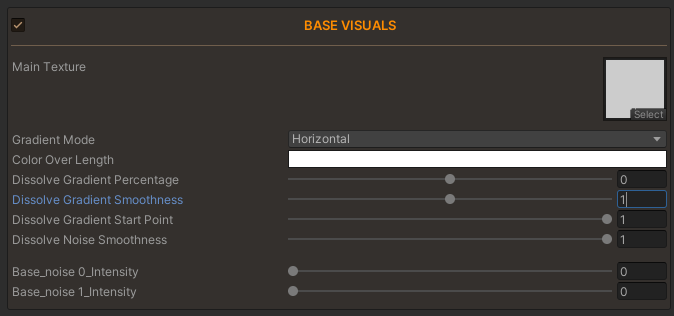
This will make things easier to grasp.
AND our;
Lifetime = 1f;
LifetimeMode = Per Vertex
Gradient Percentage
This is the main control of how much lifetime we want on this module.
If the Gradient Percentage is close to 1, the vertices will be looking
like they are almost at the end of their lifetime even when they were just born.
Example; Gradient Percentage = 0.6
If the lifetime is 1 and Gradient Percentage is 0.6f;
all vertices will go transparent after 0.4 seconds.
Example; Gradient Percentage = 0.2
If the lifetime is 1 and Gradient Percentage is 0.2f;
all vertices will go transparent after 0.8 seconds.
So why can the Gradient Percentage go below 0?
Yes, the default values should be between 0 and 1.
We will now see the merit in breaking those rules as soon as we get to the Gradient Smoothness part.
Gradient Smoothness
This controls how smooth the dissolve gradient is.
So basically the
-
Gradient Percentage
-
Gradient Smoothness
come together to create the main gradient that will be multiplied by the shape texture.
This gives us very good control over the shape but also the noises that will be added in the Noise Module
High Smoothness
percentage = 0f smoothness = 1f
Low Smoothness
percentage = 0f smoothness = 0.2f
So why can the Gradient Smoothness go above 1?
Yes, again; the default values should be between 0 and 1.
Lets explain both Percentage and Smoothness being able to break the rules.
See that the extreme values give much more control over the gradient that didn't exist before.
During Art Directing the trails; these extra alternatives give us so much freedom
Gradient Start Point
Technically;
This lets you multiply the Gradient right before the noise calculations.
Mental Model;
Imagine you can offset your lifetime with this number, bringing it lower pushes the segment further in it's lifetime.
If we had 1 second lifetime and Start Point is 0.6f, segment roughly starts out looking like it's already "0.4f years old" as soon as it was born.
Hence the name.
Default value is 1(it doesn't affect the trail)
(So far we have worked on a white fill texture so this sounds absolutely meaningless. And when you play with it now with the white fill, you'll find that it just makes it a bit more transparent.)
We didn't learn noises yet, but for now I'll put a noise on the trail to showcase what this value is for.
Example; Start Point = 1f
In this example the startPoint is 1, meaning it has absolutely no effect on anything at the moment.
this video is here so we see the difference on the next example.
Example; Start Point = 0.35f
Realize that now we have much less of the shape showing;
And as a result: Revealing the Noise behind it
Never put this value too close to 0; the trail will just be transparent.
Pro Tip
Assume this value HAS TO stay 1 until you deal with everything else. Use this as a "last touches" kind of value.
Noise Smoothness
This lets you Smoothstep the combination of all of the above(also noises combined as well). It also is a Noise focused value that makes much more sense once you have noises set up.
This is the thing that lets you get either;
- Stylized
- Realistic
- Anime
trails.
Example; Noise Smoothness = 1f
This again is a default example to let us compare with the below example.
Noise Smoothness is 1 here; it is the baseline.
Example; Noise Smoothness = 0.5f
Let's try full sharpness;
as you can see, this is dissolving fully sharply through the noise texture.
Base Gradient
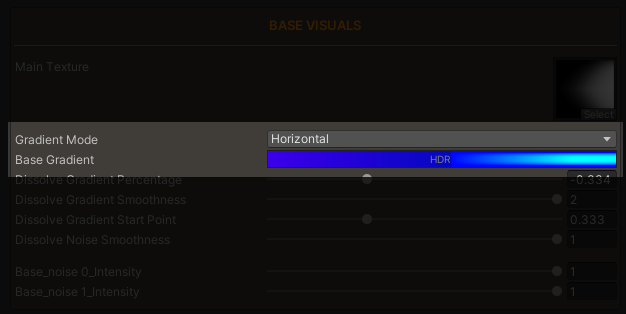
It is a gradient that lets you pass in the colors over the trail. The way it behaves depends fully on the
GradientMode right above it.
Don't worry!!
This gradient is baked into a 256x1 texture as soon as you change it and kept as a hidden subasset under
this TrailProfile.
No need to worry about optimization of gradients in the shader, or being reserved with points.
Color away! We deal with the optimization ;)
Gradient Mode
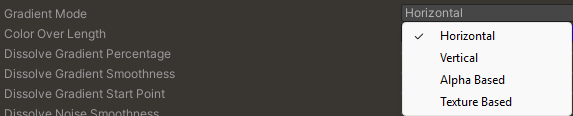
Gradient mode decides how the Gradient will behave, we have 4 choices here;
- Horizontal
- Vertical
- Alpha Based
- Color over Lifetime
Why did you use the weirdest colors for this gradient?
Well, having that red line there will help you understand the modes better. Trust!!
Horizontal
Horizontal is the default coloring mode.
It will stretch over the trail mesh and color it. It's basically the Color over Trail
you already know from Unity's trail gradients.
Vertical
This is instead the 90 degrees rotated version of the last one.
But instead, because of the nature of the mesh we have; this will actually look the same over the trail.
It is not a gradient from Tail of the Trail to the Head of the Trail but instead it goes from
Base of the sword to Tip of the sword.
Alpha Based
This takes the overall Alpha calculation(which comes from the earlier 4 values + the passed in lifetime uv's) and uses that to decide how to evaluate the gradient.
As long as you don't have a noise hooked in, this will work with the gradient we have from the Percentage and Smoothness.
But if you have some good noise textures this can help a lot
Color over Lifetime
This just evaluates the gradient depending on the "visual lifetime" left.
What's the difference from Horizontal Mode?
Horizontal is pure uv value that comes from the mesh.
Color over lifetime is the vertexColor.r(per vertex lifetime value) but AFTER the Gradient Percentage and Gradient Smoothness is applied which more accurately approximates where the trail visually starts to dissolve.
(Passed in as vertexColor.r: Check Lifetime Modes/Per vertex)
Well, then why do we even need Horizontal?
When we look at the templates you'll see that the combination of percentage and smoothness values in some trails can put the limits of that gradient very much outside the bounds of the mesh.
(And that is intended, it gives many more alternatives.)
For those cases we might want to keep the color gradient within the mesh while pushing the alpha/transparency smoothness out.
Noise 0 and Noise 1 Intensity
These control how much a certain noise texture affects this module.
Current implemetation lets 2 noise textures.(Can easily be expanded to 4 without real memory cost in the future updates. Let me know if you come across a case where you wish there was 4.)
More on this on Noise Module Section